Contextual Statement

“ALL THE KING’S HORSES AND ALL THE KING’S MEN WILL NEVER GATHER UP ALL THE PLASTIC AND PUT THE OCEAN BACK TOGETHER AGAIN.”
– Charles Moore, Marine Researcher

Our environment is our habitat. As a group project for Light Nelson, we have explored the concept of habitat. We decided our focus towards this project should be environmental, highlighting the inundation of plastics in our oceans. The scale of this work is important, to make an impact on the viewer. Synthetic Nature encourage self-reflection, playing on the theme of water. What changes can be made in the way we treat our environment? The light in the work plays a major role in the works concept, here the light will illuminate the issue and lead us in a new direction.

Light It Up

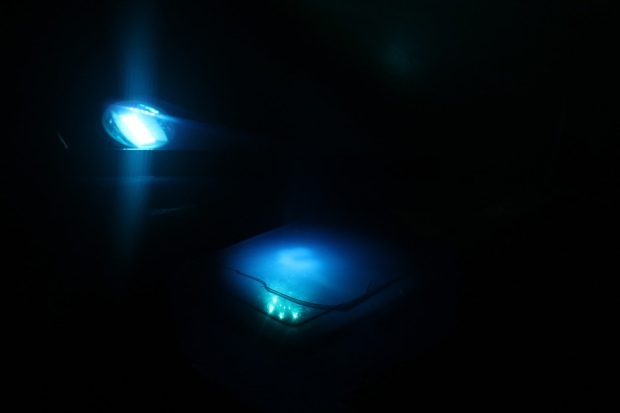
The final trial of the lighting was done on the 26th June, using the blue LED string lights going up the back, the EL wire threaded through the milk bottles, and then a large camping light placed on the inside of the wave protected inside a plastic blue container, which also casts a nice hue and gives a glow from the inside so the whole wave is illuminated. We also have a smaller light (but is still very powerful) that we may add inside, but this decision will be made when in situ and depending on how dark the car park is.

IMG_8343

The wave in itself is completed, however, we have left a gap in the large sheets of plastic that are sewn onto the sides so we can change the batteries that we will cable tie each time, the pallets we are attaching the wave onto need the top coat of black paint (this will conceal them), nail the frame at the base to the pallets using industrial staples, and also attach the trailing plastic to the pallets. This all has to be done when setting up, on location, so we will have to allow time to make these final adjustments.

Images are our own.

Creating the Crest

When brainstorming early in the process of creating our wave, the idea was to use not only plastic bottles, but a variety of plastics as the consumption of all plastics types, not only bottles, that invade the natural habitat of the oceans. One of the best ways of using other plastics is on the crest of the wave, where bubble wrap has been used to resemble the white foam that large waves create as they crash. We want to create a sense of our plastic wave coming down or over the viewer as it creates a simple direct link to the oceans plastic pollution.


We attached a layer of bubble wrap to the front of the wave. This is the crest of the wave where the white lights are placed. This catches the light and creates a really amazing frothy looking front to our wave. We attached the bubble wrap using fishing wire to the wire mesh frame. Threading the lights within the bubble wrap will hopefully protect them a bit from the elements.

We have also incorporated thick industrial plastic bags by sewing them in with nylon and a tapestry needle to hide the mesh frames on the inside, through the middle behind the milk bottles, and then also at the sides to join the front and back of the wave. Sewing the bubble wrap onto the front was easy enough compared to most of the wiring required in this project! However, threading the plastic behind the milk bottles was quite challenging, as by this stage all the other bottles had been strung onto the structure, which made it difficult to get right into the centre to attach the plastic sheets.

Image are our own.


The Second Layer

After completing the first layer we attached the blue LED string lights onto the wave using cable ties to secure them to the bottles creating lines going up and down the wave.
Just before attaching them we measured out the length of the lights in relation to the size of the top of the wave (which is roughly 1.9h by 2.5w). We discovered we would need two more sets of string lights to cover and create the aesthetic view we wanted to achieve. With these on we continued to attach the second layer of bottles over the top of the lights. Attaching them using the same method as the first layer.

Once the back of the curve was finished, we were able to move on to attaching the front of the wave. We used milk bottles at the very front as these diffused the light from the EL wire and the light that would go inside the wave.

We threaded the milk bottles the same way as the other bottles, however, we also threaded the EL wire through them before attaching to the structure. This way the wire lit up more of the bottles and was easier to secure in the required places.


Its dark, cold and raining in the images above. But the wave must go on! Many bits of chocolate have been used in the making of this wave, as fuel for the makers 😉

Images are our own.

It’s Coming Together!

The designs of how we would form the wave was done in stages, as most of the elements could not be created without one of the others being completed first. These images are of the first layer being wired to the frame, and also the rows being prepared to be temporarily cello taped together then inserted with thin wire, punched with small holes at each end to be wired through, and then finally go onto the welding mesh.
In the background of most of these images you can see boxes and bags, these are all filled to nearly overflowing with the prepared plastic bottles, sorted in like with like, washed in the boxes, unwashed still in the bags, and then another set of stacked boxes with bottles with the base cut off and then yet another box filled with these bases.

As the process of the actual brainstorming and creation of the wave structure has been so time-consuming, this held up being able to see which lights would be most visually effective, so once we had a few of the first row on the top layer of the wave completed, (and using a little imagination of how it would look with another layer on) we decided we just had to experiment.

In the top images we thread some of the EL wire through the frame at the front, with half a row of milk bottles on to see how they would soften the opacity of the lines the EL wire created. We also thought that the blue LED string lights created strips that were too vivid and made one lose the effects of the wave as a whole, however we thought this would change after we attached the second layer of bottles onto the top of the wave.
Having the lights between the two layers of bottles softens the effect of them, emphasising the wave form and bottles, as opposed to distracting the viewer from them.

Images are our own.

Creating the Structure (finally!!)

We have had so many setbacks in the process of actually forming the wave and the supporting structure. We have had contradicting advice in regards to building an armature, the best materials, whether it would stay up and be safe.
Not having experience with creating a sculpture this size before we have been unsure of which is the best advice to follow! In the end we went ahead and ordered one sheet of welding mesh, as this could be used in most of the possible ways of creating the wave, and we are running out of time and have to start the construction. (we can’t wait to get past all the struggles and actually see the installation coming together!).
We figured it would help us to see if the form would work, and be steady enough, by bending the welding mesh back onto itself and holding it in shape temporarily with rope and thin wire. (pictured.)

It was a real relief to return to our original idea for the armature and see that this structure resembled a wave!

As this design requires less plastics, the welding mesh makes up a lot of the form, it would save us a lot of time in trips to the recycling centre and washing of bottles. The mesh also creates a strong base for the installation.

As we were all happy with this structure we had to weld it together! I (Rachael) was a bit tentative at the initial thought of welding myself as was Bethan,  but I wanted to give it a go, and I figured it would be much more satisfying if we did all of the required tasks to form our wave, and welding was one of these things!  It turned out to be so much fun and was exciting to see our wave coming together! Below are the images of us preparing to and doing the welding, along with the settings of the welding machine.

(Note from Bethan: The welding has been my most memorable part of this. I was also feeling a bit freaked about welding, but it was empowering and lots of fun! A skill hopefully we will be able to use again in the future.)

Images are our own. In preparation for Light Nelson 2016

Problem Solving the Structure

After creating what would make up half a layer of plastic bottles for the wave using the brick formation, it became apparent that this method would require even more bottles than the hundreds we had already accumulated; to form the scale of installation we are aiming for. This also meant a lot more washing of bottles than we had expected.

IMG_8353
We also had concerns as to the strength of just having plastic layered, if it got windy, rainy, it could easily blow away, sway dangerously, and even fill with water and become too heavy and collapse on itself.
The test we had created by lining the bottles up and joining them together with sellotape caved when lifted, and after being rained on completely came apart, as the glues came unstuck. This confirmed our concerns of the issues that would arise when making the wave this way.

We also bought a tube of No More Nails multipurpose/industrial glue that we had checked would stick on plastic, but again, if we formed the wave out of plastics alone, without the underlying structure, this would require mass amounts of glue, and also consume a lot of time waiting for the glue to dry before adding another layer.

We then tried cutting the base off the bottles and slotting them together where possible with similar sizes and designs. This proved quite effective, as they not only fitted together well, but also had some give to create the curved form in our design.
When trying this we found how well it worked, and even though I had the idea when inserting the plastics together to have them running horizontal, when we discovered how they curved so well it was the obvious choice to string them in rows vertically.

We found some flexible, aluminium wire which we strung through the bottles, and then again at two points by punching holes into the plastic to fortify it.
We achieved this by using a stick of dry bamboo and using it like a giant needle, tying the wire to one end and threading it through the bottles.

This created the desired curve and worked well, this is how we are forming the rest of the top of our wave.

Nice curves wave.

Images are our own.

Attaching The Bottles To The Structure

After finally figuring out how we would support the wave, and then forming and welding  the armature together, we had to decide how to get the plastics on this and be able to withstand strong weather.
From the start when coming up with the idea of using welding mesh for the structure the plan was to wire the first layer of bottles onto the frame and also to one another. Pictured is an experiment we did using thick wire (5 mm) and threading this through the bottles that were drilled through the bottom and the lid.
We were not impressed with how this worked, they were extremely loose and uncontrollable. This could cause problems when attaching them to the structure, especially as the string of bottles would have to be even longer to create the correct height.

We also considered taping them together in rows and stacking them as bricks either onto the structure or just on their own.(however we were unsure about the sturdiness of just having plastic stuck with tape on their own in a bricklaying formation attached to on the welding mesh as a base).

In the above images we are contemplating the aesthetics and practicality of this method, while lining up the bottles prior to taping them together. The bottom image shows one of us bending up the corners of the reinforcing mesh, creating a tray like effect, as this stabilises the structure and gives it a sturdier form, less likely to bend and cave when moved around.

Images are our own.

So Much Plastic

This project has been a real eye opener to the mass amounts of plastic consumed daily around the world, but also here in Nelson, the quantity of plastic bottles that are processed at the local recycling plant is staggering!
We made four trips to the recycle center, due to not having room in the vehicle to transport large amounts of plastic at a time. Of these four trips we only collected a small percentage of the plastic waste that accumulates daily.

Through this large scaled installation for Light Nelson, we want to portray to the public the unbelievable amounts of plastic consumed, but also how this material is terrible for the environment and often ends up polluting the beautiful oceans due to lack of space for all the waste accumulated by plastic produce.

The plastic has been sourced from the local recycling centre in Tahunanui and also the Richmond Resource Recovery Centre. The Richmond centre is the destination where all the recycling for the area is sent to be sorted, crushed and then processed before being shipped offshore to be created into other items. Both of these places have been extremely helpful by helping us sort through the plastics, and at the Richmond Resource Recovery Centre, letting us retrieve the bottles before crushing them for shipments.

Pictured above shows us washing bottles, peeling labels, the strength of the glues left on afterwards, and also the temporary small stacks piled up in anticipation for installment.

After managing to source an unbelievable number of plastic bottles, we than have had to select the more suitable forms (and separate the squashed ones as this prevents the bottles fitting together), wash them all and then take the labels off the brands of bottles that the labels were possible to get off.
Taking the labels off the bottles made us aware of how bad the glues are for the environment, as they are extremely potent and toxic, being produced at the expense of our habitat. Each label is either entirely plastic or coated in a thin plastic film, which would also be created using machinery that pollutes the surroundings. The pile of plastic labels we pulled from the bottles was staggering too. Surely there is a better way to brand products?

One may think that washing them was unnecessary, but we were surprised (unfortunately!) by the state that people leave their plastic in when putting it in to be recycled. Most were obviously not even rinsed out, still contained the drink in it, some were covered in food, and most had the bottle lids still on (which makes the air inside smell horrible and also stagnant!). It was quite an unpleasant job!

We haven’t tried to count the individual plastics we have collected, but will do a rough estimate of the bottles included in the wave. At the end of installation we plan to return these bottles to the recycle center.

Images are our own.
It’s Begining!!!

After many brainstorms to try to resolve the issues we are having with choosing the right structure to hold our Light Nelson installation, we ordered a sheet of welding mesh, planning to create a form 2.5 square and 2 high  and building up plastics to the final width to be 3 by 3 and 2.5 high as a sculptural wave!

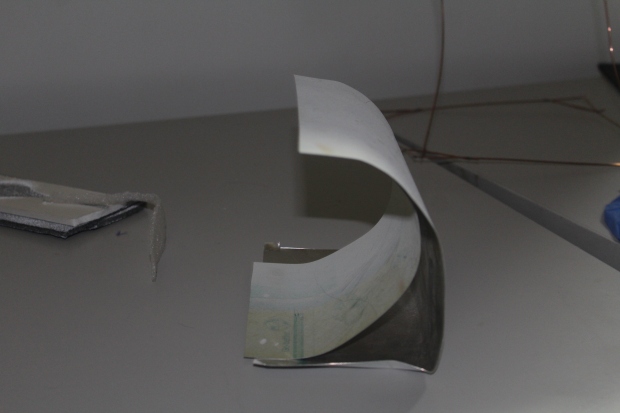
We first constructed a Marquette using paper. To do this we measured the paper to scale to represent the welding mesh:

The images above would need two sheets of welding mesh, though this looked like it could work well it would not be within our budget to buy two sheets.

We found that using this method of construction and only one sheet would require a large amount of cutting and welding the mesh, which in turn could weaken the overall structure.

There was still much we had to figure out regarding the structure of the wave and method of construction. We thought it would be good to problem solve these when the mesh arrived.

Below is a mock up of another way we could bend the mesh to form our wave, we felt that this method would work well, and save time. As long as we had sufficient weight to counter balance the weight of the bottles going on.

IMG_8634

The images below show what the steps we took today once the mesh arrived, in the small beginnings of our wave.

Image one shows the welding mesh as is, then the lay out of the bottles placed onto this mesh. The following images show the steel cutters and then the excess welding mesh being cut off. The image 3 shows us turning the edges of the mesh slightly up to make it more potent and more stable for being moved etc.

Also pictured are the amount of remaining bottles after only using what seemed like a few, we are already needing more after only covering one layer of the three meter base.

I also tried an experiment using glue gun to join the bottles, I tested the strength after the glue had dried, and it held very well, with the heavier object still staying attached when suspended or held in mid air.

Images are our own.